


Sink paint can be a practical solution to refresh a worn-out or outdated sink. Whether you're dealing with chips, stains, or simply want a change in color. Applying the right paint provide a cost-effective way to update your bathroom.
However, the process requires careful selection of materials, proper preparation, and attention to application to ensure the paint adheres properly and lasts. In this article, we’ll break down the necessary steps and considerations when painting your sink, as well as tips for maintaining the finish over time.
How to choose sink paint

Selecting the right sink paint is crucial for achieving a durable and smooth finish. Not all paints are suitable for sinks, as they need to withstand constant exposure to water, cleaning products, and wear over time. When choosing sink paint, consider the following factors:
-
Material compatibility: The first step is ensuring the paint is designed for the material of your sink, whether it’s porcelain, stainless steel, cast iron, or acrylic. Some paints are specifically formulated for certain surfaces, while others can be used on multiple materials. Always check the product label for material compatibility.
-
Durability: Sink paints should be durable and resistant to chips, scratches, and stains. Epoxy-based paints are often the best option for their strong adhesion and resilience, making them ideal for high-use areas like sinks. Look for paint that specifies it is water-resistant and can handle frequent cleaning.
-
Ease of use: If you’re planning to tackle the project yourself, it’s worth considering how easy the paint is to apply. Some sink paints are available in spray cans, while others require a brush or roller for application. Spray paints can provide a smoother finish, but brushing may give you more control in certain areas.
-
Finish: Decide what kind of finish you want for your sink. Most sink paints come in glossy or satin finishes, which can give your sink a sleek, shiny look or a more subtle sheen. The finish you choose can affect the overall look of the sink and how easily it’s cleaned.
-
Drying time and curing process: Pay attention to drying and curing times. Some paints may dry to the touch quickly but need a longer curing period to achieve full hardness and durability. Ensure you follow the instructions carefully for the best results.
In general, epoxy paints are a popular choice for sinks because of their longevity, but there are also enamel and acrylic paints specifically designed for sinks. Researching your specific sink type and its requirements will help you make the right decision for a lasting, smooth finish.
How to paint/Repaint a sink: Step-by-Step
Painting or repainting a sink requires patience, precision, and proper preparation. Follow these steps to ensure the best results:
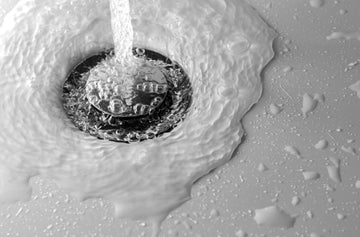
Step 1: clean the sink thoroughly
Before starting any painting project, the sink must be clean and free of any dirt, soap scum, or grime. Begin by scrubbing the sink with a mild cleaner and a soft sponge. Avoid using abrasive scrubbers, which can damage the surface. Pay special attention to corners, drain areas, and edges where buildup may occur. After cleaning, rinse thoroughly and let the sink dry completely. This is an essential step to ensure that the paint adheres properly to the surface.
Step 2: sand the surface
Once the sink is dry, lightly sand the entire surface to roughen it up. This step creates a texture that helps the paint bond more effectively to the sink. For porcelain or ceramic sinks, use a fine-grit sandpaper (around 220-grit). If your sink is stainless steel, you can use a coarser grit (around 120-grit) to create enough surface texture. Sanding will also help remove any previous layers of paint or imperfections. Once done, wipe away the dust with a damp cloth and let the sink dry.
Step 3: mask off areas you don’t want painted
Use painter's tape to protect areas of the sink that you do not want to paint, such as the faucet, drain, and edges of the counter. Cover any nearby areas that might get splattered with paint, such as the countertop or the surrounding wall. Using painter's tape ensures a clean, straight line and prevents unwanted paint stains on these areas.
Step 4: apply primer
Priming is crucial, especially if you're working with a surface that has not been painted before or if you're painting a sink that has been previously coated. Use a high-quality bonding primer that is designed for the type of sink you’re working on (porcelain, ceramic, stainless steel, etc.). Apply a thin, even coat using a paintbrush or roller, depending on the size of the sink. Allow the primer to dry for at least 2-3 hours or as directed by the manufacturer.
Step 5: apply the first coat of paint
Once the primer has dried, it’s time to apply the first coat of paint. Using your selected paint (epoxy-based, enamel, or ceramic coating), apply a thin, even layer. For spray paint, hold the can about 6-8 inches from the surface and apply in light, sweeping motions. If you're using a brush-on paint, use long, even strokes to avoid brush marks. Be sure to cover the entire sink, including the sides and edges. Allow the first coat to dry completely, typically 4-6 hours, before applying a second coat.
Step 6: apply additional coats
Depending on the paint you're using and the desired coverage, you may need to apply additional coats. Most sinks require at least two coats of paint for a durable, even finish. If you’re applying a second coat, be sure that the first one has dried fully to avoid streaks or smudging. Lightly sand the surface with a fine-grit sandpaper between coats to ensure the paint adheres properly and eliminates any imperfections.
Step 7: let the sink cure
After the final coat of paint is applied, allow the sink to cure. Curing time may vary depending on the type of paint you’ve used, but it generally takes 24-48 hours for the paint to fully harden. Avoid using the sink during this period to prevent smudges or damage to the finish. Even after the paint has dried to the touch, the curing process allows the paint to become fully durable and resistant to wear and water damage.
Step 8: reinstall or clean up
Once your sink is completely cured, you can remove the painter's tape and any protective coverings. If you've taken off the faucet or drain for the painting process, now is the time to reinstall them. Clean up any spills or splatters that may have occurred outside the sink area. Finally, take a moment to inspect the finish, ensuring it’s smooth and even. If any touch-ups are needed, apply them carefully.
How to clean sink paint

Properly maintaining painted sink surfaces is essential to preserving the finish and ensuring it remains durable. Cleaning sink paint requires gentle, non-abrasive techniques to avoid damaging the paint layer. Below are the steps to keep your painted sink looking fresh and clean, without compromising its protective coating.
Use mild detergents
The first rule of cleaning painted sinks is to avoid harsh chemicals or abrasive cleaners, as they can wear down the paint over time. Instead, use a mild dish soap or a gentle all-purpose cleaner. Mix a small amount of detergent with warm water to create a gentle cleaning solution.
Soft cloth or sponge
What you use for cleaning is equally paramount. Always use a soft cloth, towel, or sponge when cleaning your painted sink. Avoid abrasive pads or scrubbers that can scratch or chip the paint. Dampen the cloth or sponge with your soapy water solution, then gently wipe down the sink’s surface. Focus on cleaning away any soap scum, grime, or food stains without scrubbing too hard.
Rinse thoroughly
Once you've cleaned the surface, rinse the sink thoroughly with warm water. Soap scum left behind can dull the finish over time, so it's important to rinse the sink completely. You can use a gentle stream of water or a clean, damp cloth to wipe away any lingering soap or cleaning solution.
Dry the sink
After rinsing, use a dry microfiber cloth to wipe the sink. This will help prevent water spots or streaks from forming. Drying the sink immediately after cleaning is especially important to maintain the glossy finish of the paint. Be sure to dry all areas, including the sides, edges, and any tight corners around the faucet and drain.
Avoid harsh scrubbing
If your sink gets stubborn stains or mineral buildup (like hard water stains), avoid using abrasive scrubbing tools such as steel wool or wire brushes. Instead, try soaking a cloth in a mixture of white vinegar and water, then applying it to the affected area for 10-15 minutes. Afterward, use a soft cloth or sponge to gently wipe away the stain. For mineral deposits, a commercial cleaner designed for painted surfaces can be used.
Regular maintenance
To keep your painted sink in good shape, try to clean it regularly to prevent the buildup of stains, soap scum, or grime. By performing light, consistent cleaning, you avoid the need for heavy-duty scrubbing that could damage the paint layer. A quick wipe-down after each use can help preserve its look.
Touch-ups as needed
Over time, even the most durable sink paints may show signs of wear. If you notice chips, scratches, or fading, consider doing a touch-up with the same type of paint used originally. Small touch-ups can be done by cleaning the area, lightly sanding, and applying a thin layer of paint. This will help maintain the sink’s appearance and ensure the finish remains smooth.
Regular cleaning and proper maintenance of painted sinks are essential for keeping the paint intact and ensuring its longevity. By following these gentle cleaning steps, you can preserve your sink’s beautiful finish for years to come.
Bonus: tub and tile paint
Updating your bathroom with fresh paint for tubs and tiles is one of the most cost-effective ways to revitalize the space. Over time, tubs and tiles can become stained, chipped, or simply outdated. Instead of investing in expensive replacements, a fresh coat of paint can provide a brand-new look and feel.
The key to successful tub and tile painting is preparation. Because bathtubs and tile surfaces are often exposed to high moisture, they require a specific type of paint that can withstand wear and tear while adhering to slick, glossy surfaces. Epoxy or enamel-based paints are ideal for this purpose, as they create a durable, water-resistant coating that resists mildew and stains.
Maintaining painted tubs and tiles requires a little extra care. Avoid using abrasive sponges or harsh chemical cleaners that could wear away the paint. Instead, opt for gentle, non-abrasive cleaners and wipe down the surfaces regularly to prevent soap scum and mildew buildup. In some cases, touch-ups may be needed over time, particularly if the paint starts to show signs of wear. Just be sure to follow the same preparation and application steps for the best results.
Transforming your sink, tub, and tiles with paint
Whether you're refreshing a bathroom sink, tub, or tiles, painting these surfaces can give them a new lease on life without the need for costly replacements. With the right preparation, paint selection, and care, you can enjoy a durable and beautiful finish for years to come.
Just remember, each surface requires its own specific approach to ensure optimal results. From cleaning and sanding to choosing the correct paint, following these steps will ensure your painted sink, tub, and tile stand up to daily use while looking great.