


Your bathroom vanity cabinet takes a daily beating—steam, splashed water, toothpaste, soap residue, and cleaning sprays that were never meant to touch its surface. Knowing how to clean bathroom vanity cabinet materials correctly is the difference between a finish that lasts a decade and one that starts peeling, clouding, or warping within a year or two. This guide covers safe cleaning products and routines for the three most common cabinet materials: solid wood, MDF (medium-density fiberboard), and lacquer finishes. Whether your vanity is brand new or a few years old, these practical steps will keep it looking sharp without causing accidental damage.
Know Your Cabinet Material Before You Clean Anything
The single biggest cleaning mistake homeowners make is grabbing whatever spray is under the sink without checking what the cabinet is made of. Most bathroom vanity cabinets fall into one of three categories:
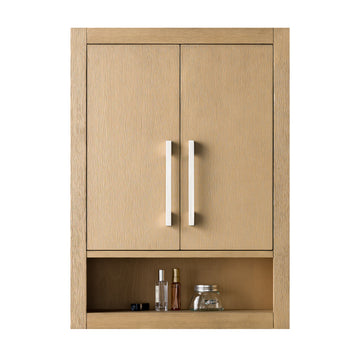
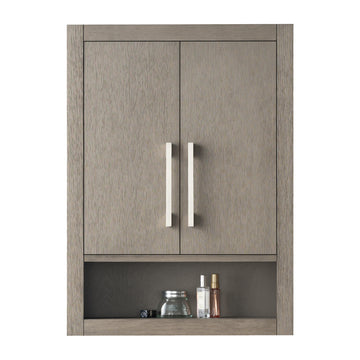
- Solid wood – naturally beautiful but sensitive to moisture and harsh solvents
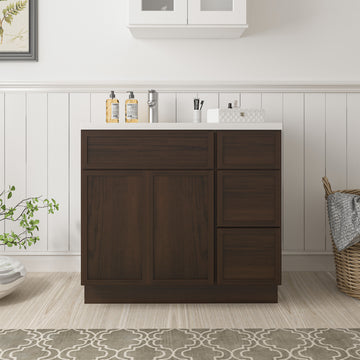
- MDF (medium-density fiberboard) – dense and smooth, but swells quickly if water penetrates the surface coating
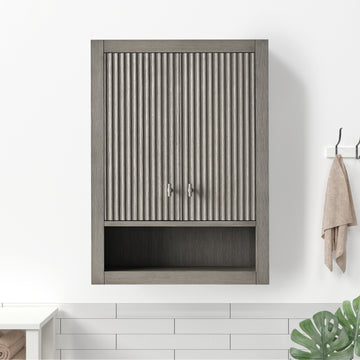
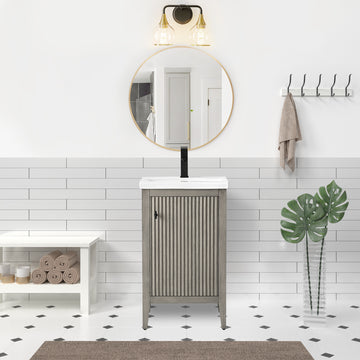
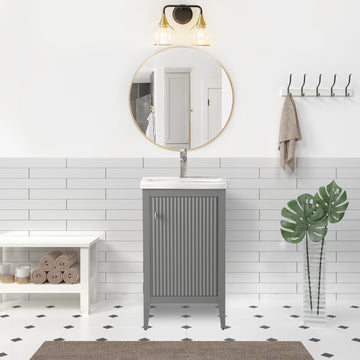
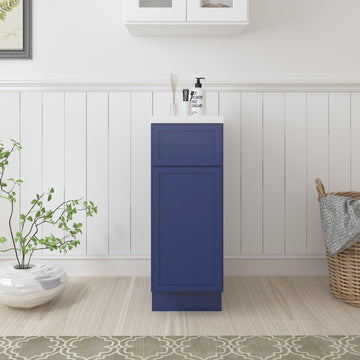
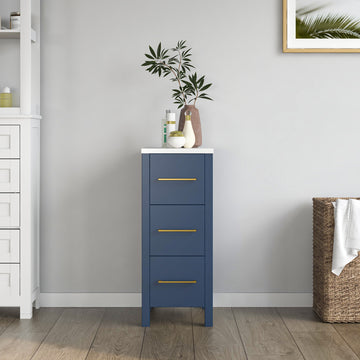
- Lacquer finish – a glossy or matte factory-applied coating over wood or MDF that requires gentle, non-abrasive care
Check your product documentation or the manufacturer's website to confirm which material you have. VanityArt lists finish and material details on each product page. If you're unsure, treat the cabinet as if it has a lacquer finish—that's the most conservative approach and safe for all three types.
How to Clean Bathroom Vanity Cabinet Surfaces: Daily and Weekly Routines
Consistent light cleaning prevents buildup that becomes difficult to remove later. Here's a simple schedule that works for any cabinet type:
- Daily: Wipe down the countertop area, sink rim, and cabinet door fronts with a dry or barely damp microfiber cloth. Dry immediately—never let standing water sit on the surface.
- Weekly: Use a mild dish soap diluted in warm water (a few drops per cup of water). Apply with a soft cloth, wipe in the direction of the grain if applicable, then follow with a clean damp cloth to remove soap residue. Dry thoroughly.
- Monthly: Inspect the cabinet interior, hinges, and drawer slides. Wipe interior shelves with the same mild soap solution and dry completely before closing.
The key rule across all routines: never let moisture sit. Wipe, rinse lightly if needed, and dry within seconds—not minutes.
Safe Cleaning Products for Wood Cabinets
Solid wood cabinets can handle slightly more than MDF, but they're still vulnerable to water damage and chemical stripping. Stick to these guidelines:
- Use a pH-neutral wood cleaner or a few drops of mild dish soap in water
- Murphy Oil Soap diluted per label instructions works well on finished wood without stripping the protective coat
- Apply with a soft microfiber cloth—never a paper towel or abrasive sponge
- Avoid ammonia-based cleaners (many glass cleaners contain ammonia—keep them away from the wood)
- Avoid bleach in any concentration; it will discolor and weaken the wood fibers over time
- Once or twice a year, apply a thin coat of furniture polish or paste wax designed for finished wood to restore moisture resistance
If your wood cabinet has an unfinished or oiled interior, use an oil-based conditioner like mineral oil occasionally to prevent drying and cracking.
Safe Cleaning Products for MDF Cabinets
MDF is engineered wood—dense, stable, and excellent at holding paint and lacquer coatings—but its core is highly absorbent. If water reaches the raw MDF beneath the finish, the board swells and the damage is permanent. That makes surface protection the top priority.
- Clean only with a barely damp cloth—wring it out completely before touching the surface
- Mild dish soap solution is your best friend; avoid anything more aggressive
- Never use steam cleaners on MDF cabinets; the heat and moisture penetrate finishes quickly
- Avoid multi-purpose sprays that contain alcohol or acetone, which can cloud or dissolve the coating
- Pay special attention to edges and seams—these are the most vulnerable spots where moisture enters
- If you notice a chip or scratch in the finish, seal it with a touch-up paint pen or clear nail polish immediately to prevent moisture intrusion
Safe Cleaning Products for Lacquer Finishes
Lacquer finishes—high-gloss white, matte gray, navy, and other popular cabinet colors—need the gentlest care of all. The finish itself is durable when treated correctly, but it scratches easily and reacts badly to solvents.
- Use only a damp microfiber cloth and mild soap solution for routine cleaning
- To remove fingerprints and smudges, a small amount of rubbing alcohol on a cloth works, but test on a hidden spot first and use sparingly
- Never use abrasive scrubbing pads, magic erasers, or powdered cleansers—these create micro-scratches that dull the finish permanently
- Avoid furniture polishes that contain silicone; they leave a film that attracts dust and can cause adhesion problems if the cabinet ever needs touch-up work
- For stubborn grease or residue, try a small amount of dish soap applied directly to the cloth rather than the surface, then wipe and dry immediately
On high-gloss lacquer, even a microfiber cloth can leave faint marks if pressed too hard. Use a light touch and work in small sections.
Cleaning Cabinet Hardware and Hinges
Handles, knobs, and hinges are often overlooked but collect grime quickly. The cleaning method depends on the hardware finish:
- Brushed nickel and chrome: Warm soapy water on a soft cloth; dry immediately to prevent water spots
- Matte black hardware: Avoid acidic cleaners; mild soap and water only, dried promptly
- Brass and gold tones: Use a soft cloth with mild soap; commercial brass cleaners can be used occasionally but rinse thoroughly
- Hinges: Wipe clean and apply a tiny drop of household oil (like WD-40 or sewing machine oil) to the hinge pin once or twice a year to prevent squeaking and corrosion
If you're in the market for new hardware, browse the Handle collection for options that complement your cabinet finish.
What to Avoid: Common Mistakes That Damage Vanity Cabinets
Knowing what not to do is just as important as knowing what to do:
- Leaving wet towels or toiletry bottles resting directly on cabinet surfaces
- Using bathroom tile spray or tub-and-tile cleaners on cabinet doors—these are formulated for ceramic and grout, not finished wood or MDF
- Spraying cleaner directly onto the cabinet—always apply to the cloth first
- Ignoring leaks under the sink; even slow drips will cause cabinet floor damage within weeks
- Using a rough dish sponge or scrub brush, even on stains—gentle pressure with the right product works better without scratching
- Closing cabinet doors while the interior is still damp after cleaning
Protecting Your Vanity Cabinet Long-Term
Cleaning is reactive. Protection is proactive. A few habits extend the life of your cabinet significantly:
- Run the bathroom exhaust fan during and for 15 minutes after every shower to reduce ambient humidity
- Place a small silica gel pack inside the cabinet if your bathroom is frequently humid
- Use cabinet liners on interior shelves to protect the bottom surface from product spills
- Keep liquid soap dispensers and bottles on a small tray to catch drips
- Check caulk lines around the sink and countertop annually; cracked caulk lets moisture travel into the cabinet below
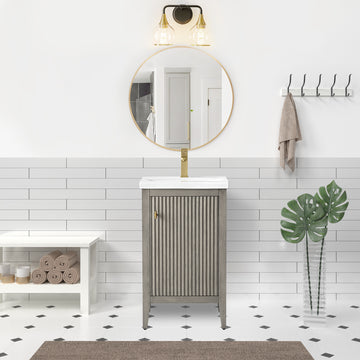
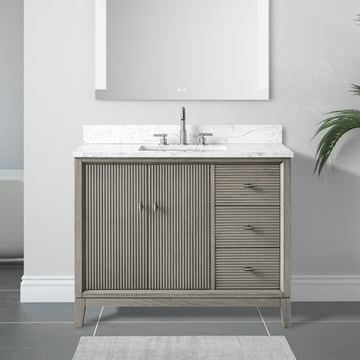
If you're thinking about upgrading altogether, the Vanities collection includes a wide range of styles. You can also explore by configuration: Floating Vanity options are especially popular for modern bathrooms since wall-mounting keeps the cabinet base away from floor moisture entirely. For smaller spaces or guest baths, the Single Sink Vanity lineup offers compact options with quality finishes that hold up well over time.
Frequently Asked Questions
Can I use vinegar to clean my bathroom vanity cabinet?
White vinegar is often recommended as a natural cleaner, but it's mildly acidic and can strip or dull lacquer and finished wood surfaces with repeated use. It's safer to stick with mild dish soap and water for regular cleaning. If you use vinegar at all, dilute it heavily and reserve it for specific spot treatments on hardware—never on the cabinet finish itself.
How do I remove water stains from a wood vanity cabinet?
For light water rings on a wood finish, mix equal parts white toothpaste (non-gel) and baking soda and apply gently with a soft cloth in a circular motion, then wipe clean and dry. For deeper stains, a wood restorer product like Howard Restore-A-Finish, matched to your wood color, can blend the stain back into the surrounding finish. For lacquer surfaces, consult the manufacturer before attempting any stain treatment.
How often should I deep clean the inside of my vanity cabinet?
A thorough interior cleaning every one to three months is usually sufficient for most households. Remove all items, wipe down shelves and walls with a mild soap solution, and let the interior air out completely before replacing products. Check for any signs of moisture, mold, or pest activity while the cabinet is empty.
With the right habits and products, your vanity cabinet will stay clean, structurally sound, and looking great for years—and when it's time for an upgrade, the Best Selling collection is a great place to start.